
If you are using Pinterest as a content curation mechanism for the 50+ million pinners, it makes sense to bring your Pinterest boards to your marketing central i.e. your own website.
How to Add Pinterest To A WordPress Site / Blog in 9 Easy Steps

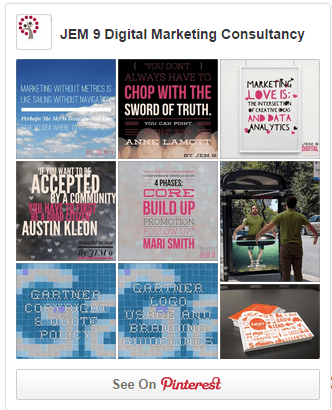
Show your website visitors a preview of your most recent Pinterest pins on your WordPress site.
The widget from Pinterest, which is available to all business page owners, includes the nice pin hover functionality and does not show private boards.
Each individual pin is clickable, bringing you straight to the individual pin. The main button at the base of the Pinterest board preview, “See On Pinterest”, brings your site visitors directly to your Pinterest business page.
As you add new pins on Pinterest, the board on your WordPress site updates automatically.
Use this method to make your Pinterest Pins easily available to your WordPress site.

1. Go to your Pinterest Business Account
http://www.pinterest.com/<whatever-the-same-of-your-Pinterest-Page-is>/ For example mine is http://www.pinterest.com/jem9dotcom/

2. In Pinterest, in top right of your ‘Profile’ box, click the drop down arrow beside the ‘spanner’ configuration icon.
3. Within this Pinterest configurations, you will see an option called ‘make a widget’. Clicking ‘make a widget’ automatically generates the code you need to add Pinterest to WordPress.
4. Copy the Pinterest code provided. (There is no need to understand it but if you choose to follow the optional steps in this article you will be able to read some of the code.)
Optional: Note the text at the bottom of the image here:
“Visit JEM 9 Digital Marketing Consultancy’s profile on Pinterest’.
We will look at how to change the default text there shortly. You might love the default that Pinterest provides. In circumstances where your Pin boards can’t render, this text will show as a link.

5. Now go to your WordPress site and log in.
Since some folks will be happy with the default and favour (favor!) speed over customization, each optional step is noted. Skip the optional a/b/c in italics in this article, if you want to go fast and simply add Pinterest to sidebar or footer of your WordPress site.
You may wish to dedicate a whole page to your Pinterest Boards. I found this a quick easy way to test what the JEM 9 Pinterest boards might look like on the JEM 9 site.
a). (Optional) Create a new WordPress Page as usual by clicking ‘add new’ in the ‘Page’ section. Within the blank new page you will see two options i). visual and ii). text. Click on the ‘text’ option.

Paste the code from Pinterest into this page. Click ‘preview’ in the right hand bar to see what the Pinterest feed will look like. You can see what mine looks like here; a whole WordPress site page dedicated to Pinterest.
b). (Optional) How to resize the Pinterest Preview. I also choose to test different sized Pinterest widgets using a whole WordPress Page (as against a blog post) first. I found it easier to preview what Pinterest would look on new WordPress page rather than preview the sidebar or footer. Within the code from Pinterest look for the ‘width’ and ‘height’ indicators. There are three items to consider here:
- data-pin-scale-width => this refers to width of the individual pins.
- data-pin-scale-height => this refers to have height of the board. A higher board will be better if you have a lot of long/vertical pins or want to display a lot of pins.
- data-pin-board-width => this refers to the width of the board i.e. the wider the more pins will show, the narrower the less pins. There are two potential things to consider here: a). the width of the screen your site visitors are using and the width your WordPress theme allocates to the main screen, sidebar and footer columns.
Within the code it will look like this:

The defaults that Pinterest provides are likely to work in many circumstances:
data-pin-scale-width=”80″ (width of individual pins)
data-pin-scale-height=”200″ (height of the board)
data-pin-board-width=”400″ (width of the board)

Change a measurement, then hit the preview button to see what it looks like. Here are some examples do give you a sense of what changing the measurements will do.

This board is sized to fit only one pin as the pin width is 80 pixels and the pin board height 100, only 20 pixels larger than the pin itself.
At 100 pixels wide, only one pin shows across the width and it’s also so narrow that the description is cut off. In other words, this is too small.

Our second sample board keeps the pins the same size at 80 pixels.
Here however the pin board is 400 pixels wide so four pins fit comfortably.
At 100 pixels the board is sized to fit approximately one row horizontally. The heading appears nicely as does the button to bring you to Pinterest.
This is a good option for a small amount of screen / website real estate.
With this third option the pins are slightly larger at 100 pixels.
With 320 pixels in the width, three pins fit comfortably across in each row. The board is almost square due to the height choice of 300 pixels.
There is also an example with larger pins and a large board where I dedicated a whole page to the JEM 9 Pinterest Boards.
Bear in mind the width of smartphone and smaller tablet screens. Also site visitors reading your site on mobile may well use both the horizonal and vertical orientations. Many embedded widgets choose a width of 300 px i.e. 300 pixels.
Here is a nice little guide to screen pixels. I particularly like the visual showing the usable site space for different sized screens.
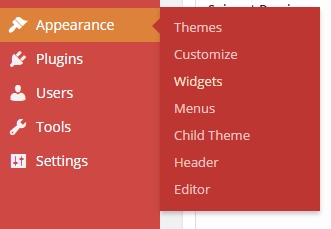
6. Within WordPress, I decided to add this to the sidebar on my site, from the main WordPress left navigation bar, choose ‘Appearance’, then ‘Widgets’. 7. Once on the WordPress Widgets screen choose the ‘Text’ widget and click ‘Add Widget’.


My WordPress theme has both a sidebar and a footer widget. I chose to add the Pinterest board preview and associated follow button to the sidebar. 8. Within the WordPress Text Widget, simply paste the code from Pinterest (or the code with the measurements edited if you decided to go with different size pins or board). Click ‘save’. c). (Optional). In point 4 above I drew your attention to the text at the bottom of the image. Here it is again. “Visit JEM 9 Marketing Consultancy‘s profile on Pinterest’. If the Pinterest Widget Board can’t load this line of text will show.
For example if the screen is too small for the board to show instead this line of text shows up. If you want to change this you can. I found the inconsistent capitalization difficult to read so I changed it.
To change the text, within the default code provided by Pinterest, that you’ve already pasted into either the page or the text box, you’ll find this line of text:
“Visit <name of your Pinterest Business Page>’s profile on Pinterest.”
Edit this to something that works for you.
9. Still within WordPress, hit publish and you have added Pinterest To Your Site.
=> Now all that remains is for you to go and check out what your new Pinterest Boards looks like on the desktop and SmartPhone version of your website. Your mobile users’ will be glad you did.
And you’re done.
- You can read more about the various different types of Widget’s available from Pinterest here.
- Visit JEM 9 On Pinterest by clicking the Pinterest Board on this page.